Craft Hope…

2010-02-09.JPG

Okay…I am not a knitter and I am not a crocheter……that is for sure!  But I am almost done my red scarf for Craft Hope’s latest project.   The scarf has to be at least 60 inches long and it is due by February 14th…so I must mail it by Thursday!  I have been working on this one scarf for about 3 weeks.  I must finish it.  I don’t think I will ever make another again….though never say never…this is something I have definitely learned in life!  Wish me luck!

Oh..and it is the last day to enter for the custom woolie giveaway…..check it out…..at the Etsy Cloth Diaper Team blog.

Recycled Chunky Crayons…

2010-02-01aa.JPG

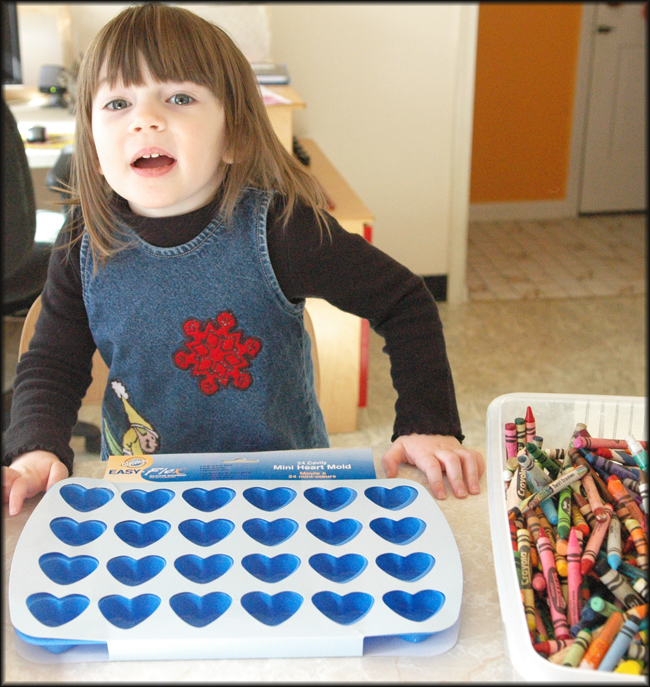
So, I saw this great project for recycled chunky crayons from the makesandtakes website.  I decided we just had to do it.  It looked like a lot of fun.  So, first I had to go out and buy some candy molds..since I didn’t have any.  We found some fun ones.

2010-02-01aaa.JPG

Next, we had to start breaking up the crayons.   I thought we had a million broken crayons without the paper…but I was surpised how quickly we ran out of them. So, I had to start taking the paper off all the crayons…and that was not fun!  It got tough..some of the paper was almost glued on the crayons!

2010-02-01b.JPG

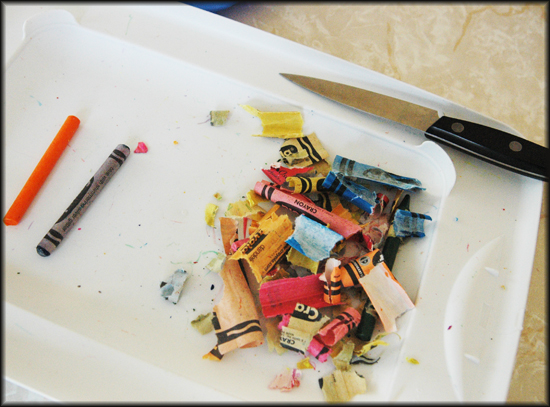
I had to break out a knife and start cutting the paper off!

2010-02-01d.JPG

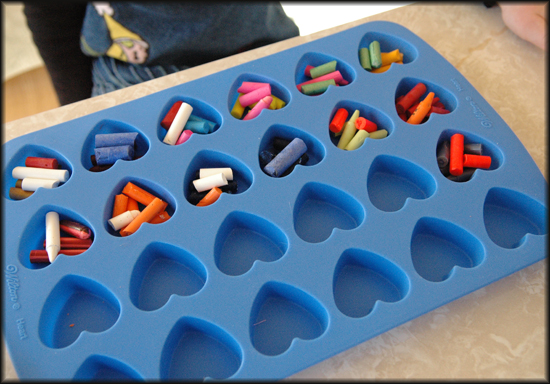
But River had a great time breaking up the crayons into tiny pieces.  She got very good at it…and in no time at all…we had the molds filled!  I didn’t want to do all 24 hearts..I thought that was a bit too many….

2010-02-01e.JPG

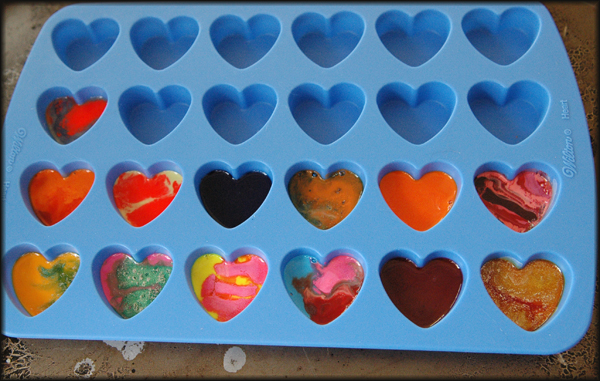
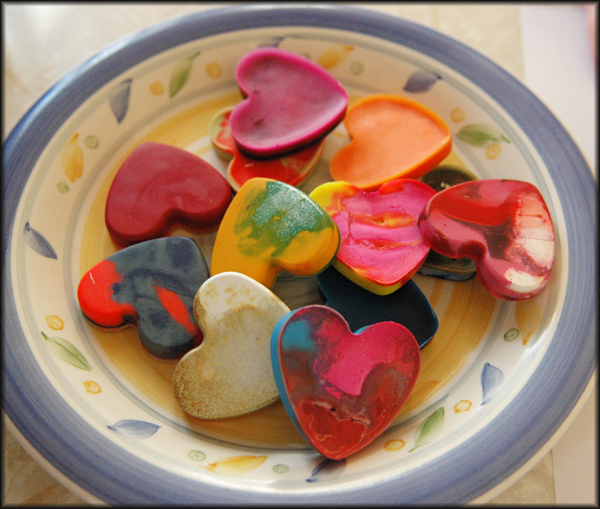
Once we had the molds filled…we followed the directions and put them in the oven at 225 degrees for about 10 minutes.   They came out perfect……we didn’t swirl them anymore…they seemed great just the way they were…some of the crayons were metallic..so those had a neat look to them.

2010-02-01f.JPG

We waited for them to cool..which was the hard part!  Once they were cool….we poked them out of the molds……

2010-02-01g.JPG

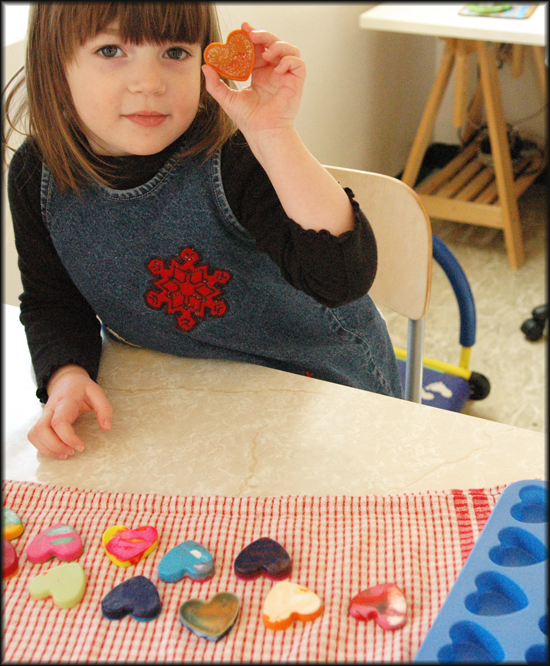
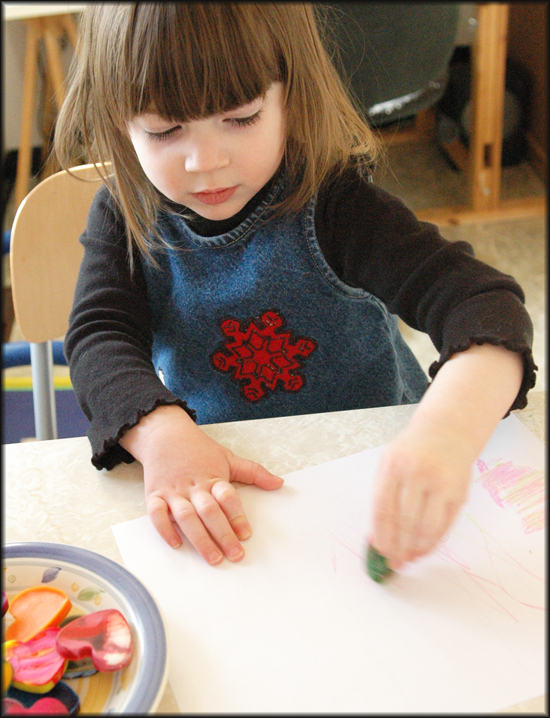
And finally River got to color with them!  It was a lot of fun.  Now, my ten year old wants to do it!

2010-02-01h.JPG

Bean Bags…..

2010-01-29a.JPG

So, I’m trying to get ready for next week…I want to stock my Etsy store with lots of things!  I have done some bean bags in the past, but I’ve never put them in my Etsy shop.  So, I thought now would be the perfect time!  They are ten really cute numbered bean bags.  The numbers are one one side and then a color coordinated picture is on the other side.

Don’t forget to check out the EtsyclothDiaper site for all the information!

2010-01-29b2.JPG

2010-01-29c2.JPG

I had a little bit of material left over…so River decided she wanted a bean bag…though she already has a complete set…but none that she has drawn herself.

2010-01-29d.JPG

She loved the fact that she got to use “special” markers…meaning permanent. She took a long time to draw her picture!

2010-01-29e.JPG

Then she got to “help” me sew the bean bag.  She did a great job…..

2010-01-29f.JPG


2010-01-29g.JPG


2010-01-29h.JPG

Next the bean bag had to be turned outside right and then filled with beans! Then the bean bag had to be sewed shut!  And then it was ready for fun!

2010-01-29i.JPG

Star Book Ornament….

2010-01-07a.jpg

Quinn wanted to make Christopher something unique for Christmas.  I looked online and found a really cool idea.  I found a website called Marlies’ Creative Universe.  Her site had great directions for making a mini star ornament..which we decided to make into a mini book star ornament.  Quinn thought of one of his favorite books that he and Christopher loved reading together.  We scanned the cover and the first 14 pages.  These we used for the “smaller” pages.  Each measured 2 inches high x 3 inches wide.  Then we chose green paper for the “larger” pages, which were 2 inches high and 5 inches wide.  And red for the”medium” size pages, which were 2 inches high and 4 inches wide.   We needed 7 of each of the different sized pages.  The website has great directions and templates.

Instead of making a plain cover, we scanned the cover and personalized the back cover.  The one thing I would do differently, when I make it again, is to make the cover one piece of paper, not two.

It turned out great and Quinn was so happy!  It took a long time and a lot of patience…but he did it almost completely himself…and he was so proud of it!  I think we will definitely be making this again….it would  make a great gift for any book lover.

2010-01-07b.jpg


2010-01-07d.jpg


2010-01-07c.jpg