Drawing with Pastels and paper mache paste…..

Today River wanted to use pastels…she uses them sometimes at her art class and she’s been wanting to use them again.  So, I wanted to come up with a fun little art project using them in a different way.  I found this project on the KinderArt website.  They have a lot of great ideas!

First, we needed to get the supplies together……paper (I like to use thick watercolor paper….it works very well when you are using a “wet” medium!  But you could use any type of paper that you have!!), a brush, a container with a bit of water, cornstarch, glue, and pastels.

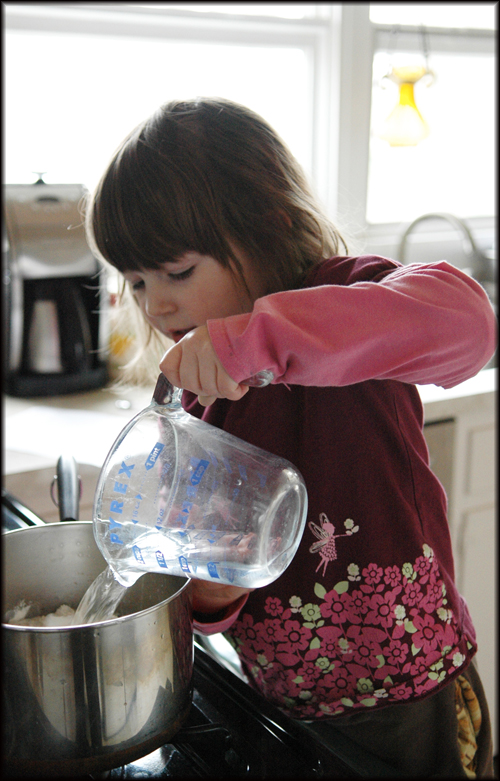
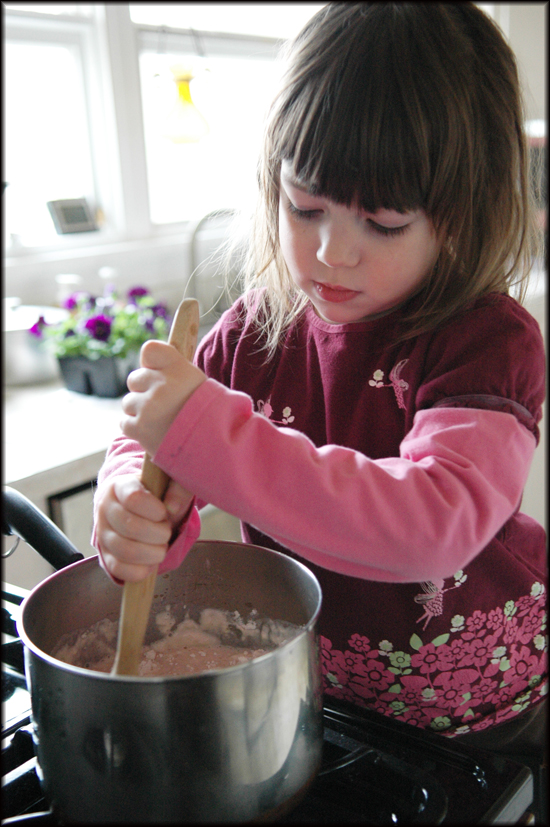
You have to make the paper mache paste…and there are many different recipes you can use..I like to keep it simple and just take a little bit of water, glue and corn starch.  Mix them all together and you’ve got it..simple.  Then, you want to take your brush and spread it across your paper…get it nice and wet!

Then, just start drawing..or having your little one start drawing!  The paper mache paste makes the pastels glide on much easier and they have a more vibrant color.    I think children really enjoy using the pastels this way because it gives them a different texture….more like a thick paint.   If the paper starts to dry out..just reapply the paper mache… (if you go over a section that has been drawn on..it may make the drawing spread a bit..so be careful…though this is a neat effect…..)

River really enjoyed this project and worked on her drawing for a long time….she does a great job filling up the whole paper…some children have to be encouraged to spread their work out…they get a giant piece of paper and only work on a small area….

She made sure to use every color in the box!  This was a very easy art project that got great results!

Edie’s Fashion Factory……blog….

Okay..I just found a totally cool blog…or should I say…it found me…..Edie’s Fashion Factory.  She did a great post today about dying Ugg boots with Rit dye…and used my blog post!!  How cool is that!  The blog is all about Rit Dye and has “fun tutorials, technical tips and tons of colorful explorations.”  It is a fun site to click around and find inspirations!

Butterfly craft project…..

I follow Meg’s blog over at Whatever.  It is a wonderful blog filled with colorful photographs.  She does a craft every Thursday.  This past week she did a great craft project with butterflies.  I got inspired to do the same craft.  Usually, I let River just paint or glue whatever she wants..but I thought it would be fun to do a more focused project.

At first she complained because she was in a “painting mood,” not a “gluing mood”…but I convinced her it would be fun!

Of course, she wanted giant pink wings!   She had a great time gluing…..I think she worked on this project for over an hour!!  When she was finished, she insisted that the butterfly be turned over and more gluing needed to be done…on the other side!

When she was finished, I insisted that I take “adorable” photos of her and her butterfly…she didn’t agree and wasn’t happy with the photos..though I took them anyway!

Chalk Paint…

I have seen a couple of different craft sites that talk about chalk paint…it sounded interesting, so we thought we would give it a try!

It has been extremely hot around here, so I made sure we did the project early in the morning, before it got too hot!

The recipe called for 1/4 cup of cornstarch, 1/4 cup of water and some food coloring.   The recipe warned to make sure you put in the cornstarch first, then the water..so that is what we did!  Then we got started painting……

River had a great time..but I must say, I was a bit disappointed….it didn’t work that well….our sidewalk/driveway is very rough..so maybe that is why it didn’t work.

River painted the driveway, the sidewalk, the fence, the stones, and then she started painting the trashcans!  She wanted to paint the house, but I said no…so she started painting the plants….

I think River’s favorite part was rearranging the paints and moving them all over..trying to find something new to paint.

She had a great time and didn’t complain about the paints one bit….she only complained when I said it was too hot and we had to go back inside!  She did get it all over her dress…and I’m assuming it will come out in the wash….I’ll let you know!

Father’s Day tradition….

A Father’s Day tradition we have in our family is writing stories and creating our own books.  I think we started writing them in 2000, when Tuesday was only 3 years old.  Quinn did his first story in 2002.  And River did her first story last year.  It has been such a fun tradition.  I think the best part is getting out all the old ones and rereading them every year!

I use a template that I created in Publisher and type the stories.  When you make a template, remember to leave a big margin on the left hand side for binding…if  you don’t, some of your text and pictures will get cut off!

Then I print them out on thick stock paper.  The children then add their pictures, usually using  Sharpie markers.  I love the Sharpie markers because they are the brightest and they don’t seem to fade.   After all the pictures are completed….we head on over to our local teachers’ supply store, where they have a laminating machine.  I get all the pages laminated….then we head on over to our local Kinkos/Federal Express shop and I use their work station to cut the pages all out and get them reordered……then I have them bind them for me.  (Why don’t I just have the Kinkos/Fed Ex shop do the laminating?  Because they charge about $1.50 per page!!  It is much cheaper to go to the local teachers’ supply store..they charge you something like thirty-two cents a yard!)

I love the laminating because it brings the vibrant colors out and it protects the pages…makes them seem more like a real book!  I always use a cover page…and then an inside dedication page that says the year.

The kids are always so proud of their stories and pictures!  It is a great tradition or gift idea for any occassion!

Mailboxes and letters…..

One of the River’s favorite things to do is to send and receive letters and items!  We have two mailboxes that we got from the dollar store….one is hers and one is for the family.  They have been decorated over and over again.  She loves to put little notes, drawings and items in the mailbox for the family, put the flag up and wait……until she receives something in return!  The other day, she wrote a little note to her daddy and put it in the family mailbox.  The next day she received a lollipop in her mailbox!  So, she promptly wrote her daddy MANY little notes…..hoping for you know what!

Now, normally she doesn’t receive candy in the mailbox, normally it is just little pictures, notes or stickers.  She loves sitting down and thinking about who she is going to send something to……and the anticipation of waiting for them to receive it and send something in return is just too exciting!

Don’t forget to enter my latest giveaway!!!!!!!!!!!!  I’m giving away a $25.00 gift certificate to my Etsy shop!!!

Watercolor Sandwiches….

River loves going to art class, but during art class she is supposed to eat lunch.  Sometimes she is so excited about the class, that she forgets that it is important to eat the lunch.  And then she gets hungry…..and grumpy..which isn’t good.  So, I try to do whatever I can to make her excited about her lunch.  She loves the concept of eating her lunch at the class, but actually eating it, is another thing!

So, to make her sandwich extra exciting..we make it into a watercolor sandwich!  We make her sandwich and then River picks out a cookie cutter design.  This time she chose a butterfly!  Then, I take a glass bowl and add a few drops of food coloring and add a few drops of water.   I have a special paint brush that is used only for food coloring.   Sometimes I paint the design for her and sometimes she wants to do it herself!

If she is doing it herself, I have to make sure she doesn’t use too much “paint” or the sandwich may become a bit soggy! If it does get a little soggy, I just leave it out for a bit and it dries quickly.   It is a simple thing that just takes a little bit of extra time.  And it involves River in making and getting her lunch together and packed, which I always think is important….and a good motivator!

Bean Bags for Craft Hope…

12.JPG

I finally finished my bean bags for Craft Hope!  Their current project is making bean bags for schools in Liberia.

3.JPG

4.JPG

I decided to make the bean bags using felt and my embroidery machine. First, I had to sew a stabilizer to the back of the material and cut out all the letters.

6.JPG

7.JPG

Then I measured out all the squares..I did 5 inches x 5 inches…it seemed like just the right size.  I used spray adhesive to get stick them first to the felt while the embroidery machine did its work.

8.JPG

9.JPG

So that I wouldn’t have to use extra felt….I embroidered all the letters first, then cut them out into squares.

9a.JPG

10.JPG

Then I sewed the back onto them, leaving the top open.  I used a different color felt for the backings, just to add some more color.  Then they all got stuffed with plastic pellets.

11.JPG

121.JPG

The only thing left was the bag! I did the lettering on the embroidery machine and then sewed a drawstring!  It was a very fun project.  I love Craft Hope and I can’t wait to see what their next project is…if you love to sew or are a bit crafty, please join their latest project.  You have until May 15th to get the bean bags done!

Play Dough from scratch…..

1.JPG

Okay..now I know that probably every one out there has made their own playdough!  Well, I never have!  And I have been meaning to for a long time…so I came upon this recipe and thought no time like the present!

2.JPG

River was very excited when I said we were going to make our own playdough..she immediately was ready to help!  The recipe called for a cup of salt!  I don’t think I ever used that much salt for anything.

3.JPG

It was a very simple recipe and in no time we were stirring away.  Quickly, it became hard to stir….. though River didn’t want to give up…..

4.JPG

Then River decided she wanted it to be pink…so we added some pink food gel.   The recipe said it was ready when it started pulling from the sides of the pot…so we knew it was ready to go!

5.JPG

River got down to making pizza right away….

6.JPG

Oh, I also added a tiny bit of mint extract so that it would smell nice.  She played with the play dough for about an hour.  When she was done playing….we packed it up in a ziploc bag for another day!  Here is the recipe:

Homemade Play Dough

2 cups             flour
1 cup                salt
1 tsp                 cream of tartar
2 tablespoons   oil
1 tsp                 food coloring (optional)
2 cups              water
-Mix ingredients in saucepan over medium heat while stirring constantly. It’s done when dough starts to leave sides of pan.
– Remove from saucepan and knead for a few minutes once it’s cool enough to touch.
-Store in a closed container.

Recycled Chunky Crayons…Part Two……

2010-02-10a2.JPG

Well..It is a blizzard out…or so they tell me….so we decided to work on Quinn’s Valentine Day cards…..He wanted a star mold..not hearts (too girlie)…..and the only mold I could find had six stars….so we had to do it four times…in hindsight..I should have bought two molds..but I figured how often am I really going to use these molds…….

2010-02-10b.JPG

I think I lost count of how many crayons we took off the paper…I wonder if Crayola sells “unwrapped” crayons for craft projects like this…..I will have to check into that…..I would say each mold took about 3 crayons…and we did 24 molds….that’s only 72 crayons..it SEEMED like a lot more….(I like all the icicles in the windows in the background….)

2010-02-10c.JPG

Well…..then after doing all the lovely star crayons…..Quinn then had to make the actual cards…..we stuck the crayons onto the cards using two sided foam tape……they turned out great……now back to this blizzard…..

2010-02-10d.JPG