
I still have a lot of sewing to do…….before Christmas…but please don’t tell……….
featuring unique and handmade items to make the world a brighter place

I still have a lot of sewing to do…….before Christmas…but please don’t tell……….

Did I tell you that on Halloween we went trick or treating with a dog…..a dog named Duke. And that he wore a tuxedo….a tuxedo that I sewed him! I’ve never sewed a tuxedo before..let alone a bow tie and top hat!! It was a lot of fun to sew Duke his costume..but the fittings weren’t too fun….we had to make a few last minute alterations….like stuffing his hat with newspaper and shortening the jacket sleeves…..
When it came time for the actual trick or treating…Duke was great…he kept his hat on the whole time! The only thing was..he got more attention than my pink robot child!! People were pushing her out of the way to get a look at the adorable dog! One lady even said….”the pink robot is cute…but that dog is the cutest!” Even when Duke stayed down at the end of the driveway…near the sidewalk…people came out of their houses…just to see the dog! One guy even brought his dog out to meet Duke!! Other trick or treaters were running across the street to check out the “adorable” dog!!
I’m not sure if we are asking Duke to go with us again next year…..


River wanted a Halloween skirt…so I looked through my stash…I knew I had some Halloween material somewhere…when I found it….I had already started making a dress…I guess last year..so I finished it up…and River loved it…..especially with her candy corn socks! Happy Friday……


Katy, over at No Bill Dill, had a blog post yesterday about her first memories of sewing. It got me thinking about my first memories of sewing. I was impressed that she actually had the item that she had stitched as a young child. Then, last night, I suddenly remembered the little paper dolls that I had…actually my youngest daughter now has them. And they aren’t made from paper, they are made from some type of plastic.

I got them when I was about five years old. My grandmother’s church always had a bizarre at Christmas and spring time. All the church women would make crafts to sell at the bizarre. I purchased these wonderful dolls and played with them constantly I immediately realized that they didn’t come with enough clothes and I had to make more!
(I don’t think I named the dolls until several years later…as I can see by the cover of the folder!)

I remember asking my mom for some material. She had just finishing sewing an Easter dress for me and had some left over material. So, I cut out some outfits for my dolls. I don’t know if you would exactly call this “stitching”….it was more like cutting and gluing. But I did have to stitch on the snaps….and it took a long time to sew on all those snaps!

But I did keep the dolls, all these years. And my children all loved playing with them!

Sew Mama Sew! is having a contest. The theme is “How My Life Would Be Better With a Serger”. This is my entry for the Sew Mama Sew! Back to School Giveaway…..
 My name is Oscar Husqvarna. I’m a 12 year old sewing machine from Sweden. I’m a traditional machine, looking for a long-term committed relationship.
 While I have a wonderful seamstress, I have yet to meet the serger of my dreams. My perfect serger would have 4 thread sewing, an adjustable stitch length and a can-do attitude.
 I have a playful personality, but I’m a hard worker who believes in team work. I’m a reliable machine whose favorite projects are quilts and home décor.
 I love the outdoors, taking romantic walks in the park, and keeping all my feet and needles well maintained.
 I’m looking for a serger that I can settle down with and I dream of one day hearing the pitter- patter of little bobbins.
 If you are a serger, looking for a good sewing machine to work on the rest of your projects with you, let’s get together for a simple pattern and see where it leads….
Awhile ago, I posted photos of my latest mural being finished…but the area wasn’t completely finished…..I still had to make new seat cushions. I wasn’t sure which fabric I wanted to use…so it took me awhile to decide. I needed a fabric that could take a beating…..3 children, 2 dogs and 5 cats! I decided to go with a thick corduroy in green. I love the color and I think it goes well with all the other crazy colors in our living room!

Yesterday I finally got around to sewing up the covers! The kids instantly loved them and wanted to sit in the “nook” and read and rest! Now, I just need to make some pillow covers! Maybe next week……


I’ve spent this past week taking all of Tuesday’s old clothes, that don’t fit her any longer and upcycling them into clothes for River. I found this adorable pattern at MADE. Dana’s blog is incredible! It is filled with all kinds of great things…I especially love her patterns…and this one was free! It turned out so cute. I made it from an old tshirt.

The image on it is from Geninne’s Art Blog…..awhile back she had a free image download and I have been wanting to use it on something. I thought this seemed the perfect thing! The image is simply elegant!
The next dress I made was also from an old tshirt…I found the idea for this design at Happy Together….I loved the little flowers and they were so simple to make!

This dress was also easy and quick to make….and River loves it (please ignore the cracker goo on River’s face)!

I love taking something and creating it into something else! I also liked the ruffles idea from the Happy Together site and used them for the shirt….(this shirt was originally going to be a dress..but it ended up being too short). This shirt was mailed to me from an organization and I knew I would never wear it. It had a large logo on the left hand corner, so I had to cut that out. I made the sleeves a little puffy to add some feminine detail! What things have you upcycled recently?
********And don’t forget to enter my latest giveaway*********
I’m giving away a $25.00 gift certificate to my Etsy shop!!!


River’s grandmother is blind, so we are always trying to come up with neat little gifts to make that are appropriate. Whenever River draws a picture for Gram, I go over it with glue or puffy paint. Sometimes she just draws directly with either one. Sometimes she glues buttons, pom poms and other objects onto paper. Today, Gram is in the hospital, so River wanted to do something extra special. We gave it some thought and came up with the idea of a little stuffed animal.

River decided she wanted to make a bunny stuffed animal. So, she drew the design on a piece of paper. Then I cut it out.

Then River picked out some felt and we cut that out together.


Then River picked out some button eyes and helped sew them on! When she realized that she was actually doing it, she got so excited!

River picked out some fringe that she wanted to add as hair and then she helped cut out some ear shapes.

Because we like to get as many senses as possible involved in the project, River thought it would be fun to add some “crinkle” stuff to the inside. So we searched around for something that crinkled and found an old plastic table cloth that I had saved as a drop cloth. We cut it into some small pieces and River stuffed it in.

Then, she closed her eyes to see how the stuffed bunny would “feel” to Gram. She decided that is had lots of great “stuff” to feel…so we called it done! She was so proud of what she had made..and she couldn’t wait to give it to her Gram…and her Gram loved it!

Also, don’t forget to enter my latest giveaway!!!!!!!!!!!! I’m giving away a $25.00 gift certificate to my Etsy shop!!!

River is completely toilet trained, therefore she wears underwear during the day..but at night she needs something a little more….so I’m trying to perfect my overnight underwear…so far, I’ve made two pairs. One is a bit too small and this pair is a bit too big…I need to find the in-between. The important thing is that she loves them and is excited to wear them!

I finally finished my bean bags for Craft Hope! Their current project is making bean bags for schools in Liberia.
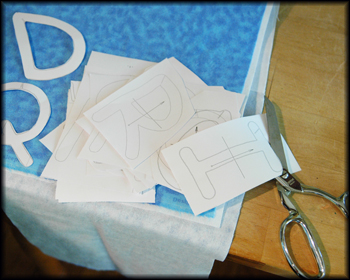
I decided to make the bean bags using felt and my embroidery machine. First, I had to sew a stabilizer to the back of the material and cut out all the letters.
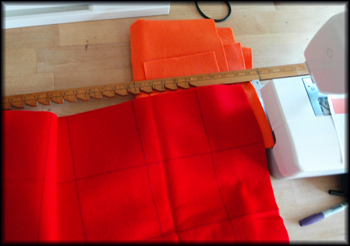
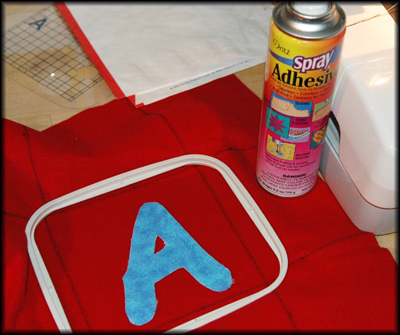
Then I measured out all the squares..I did 5 inches x 5 inches…it seemed like just the right size. I used spray adhesive to get stick them first to the felt while the embroidery machine did its work.
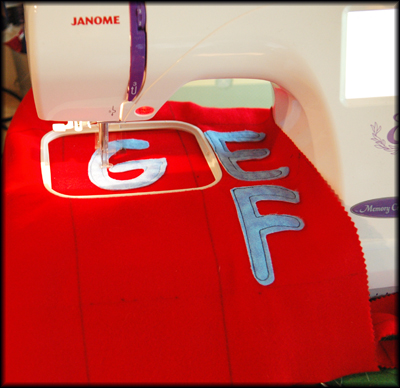
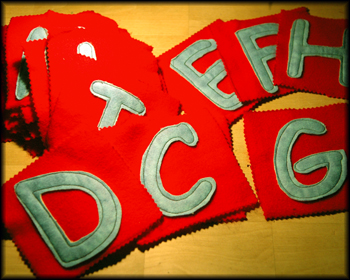
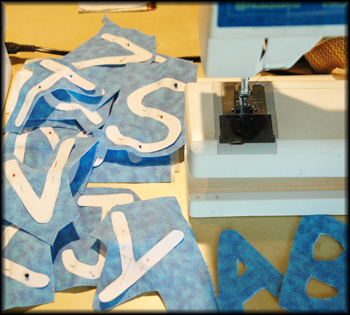
So that I wouldn’t have to use extra felt….I embroidered all the letters first, then cut them out into squares.
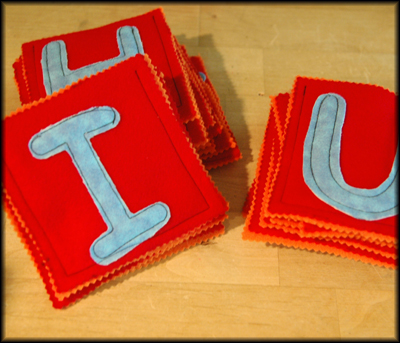
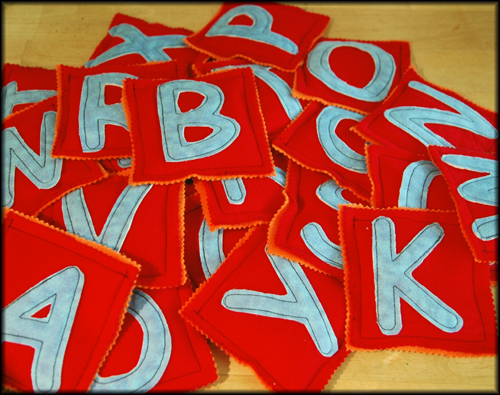
Then I sewed the back onto them, leaving the top open. I used a different color felt for the backings, just to add some more color. Then they all got stuffed with plastic pellets.
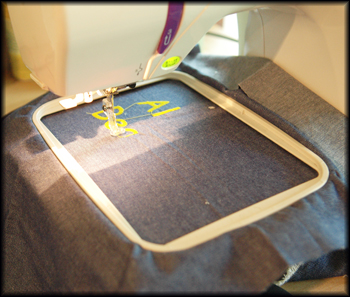
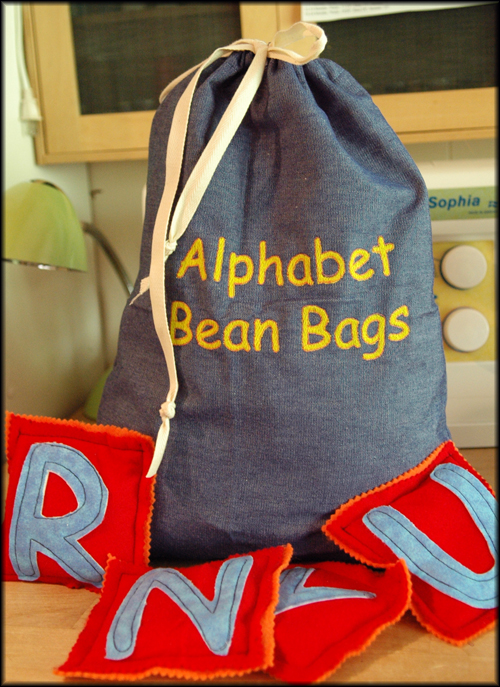
The only thing left was the bag! I did the lettering on the embroidery machine and then sewed a drawstring! It was a very fun project. I love Craft Hope and I can’t wait to see what their next project is…if you love to sew or are a bit crafty, please join their latest project. You have until May 15th to get the bean bags done!
